Discover the versatile flat bottom zippered pouch, a popular DIY project perfect for beginners. Its functional design stands upright, making it ideal for makeup, travel, or everyday organization.
What is a Flat Bottom Zippered Pouch?
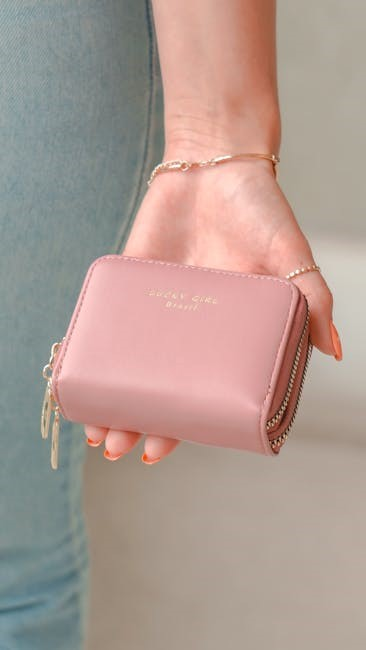
A flat bottom zippered pouch is a versatile, lined bag featuring a sturdy, flat base that allows it to stand upright. Designed with a zipper closure, it combines practicality and style, making it ideal for storing makeup, travel essentials, or small items. Its structured design and ease of customization have made it a popular choice for sewists of all skill levels, perfect for everyday use or as a thoughtful gift.
Why Make a Flat Bottom Zippered Pouch?
Creating a flat bottom zippered pouch is a rewarding project offering both practicality and creativity. Perfect for beginners, it teaches essential sewing skills like zipper installation and working with lining. The pouch’s upright design makes it ideal for organizing makeup, travel essentials, or small items. Customizable with various fabrics and sizes, it’s a thoughtful gift or personal accessory, combining functionality with personal style.

Materials and Supplies Needed
Gather essential supplies: fabric for the exterior and lining, fusible interfacing, a polyester zipper, and basic sewing tools like a machine, scissors, and pins for a smooth project.

Fabric Requirements
For a flat bottom zippered pouch, choose durable, woven fabrics like quilting cotton or novelty prints. Use one fat quarter for the exterior and another for the lining. Ensure fabrics are pre-washed to prevent shrinkage. Cotton blends or canvas also work well, offering structure and style. Select complementary or contrasting prints for a personalized look, ensuring both fabrics match in weight and texture for optimal results.
Interfacing and Stabilizers
Add structure to your flat bottom zippered pouch with interfacing or stabilizers. Fusible fleece or interfacing is essential for stability, especially for the exterior fabric. It prevents stretching and gives the pouch a professional finish. Cut interfacing to match your fabric pieces and fuse it using heat and pressure, following the manufacturer’s instructions. This step ensures your pouch maintains its shape and durability over time.
Zipper and Basic Sewing Tools
Select a zipper longer than your pouch’s top edge for easy closure. Use a zipper foot for precise stitching. Essential tools include a sewing machine, sharp scissors, pins, and a seam ripper. Iron and ironing board are crucial for fusing interfacing and pressing seams. These tools ensure professional results and smooth construction of your flat bottom zippered pouch.
Pattern Preparation
Create or use a template with a 1/4 seam allowance. Customize the size for your needs, ensuring accuracy in measurements for a professional finish. Essential for success.
Creating the Pattern
Begin by drafting a template with precise measurements. Include a 1/4-inch seam allowance for accuracy. Customize the size to suit your preference, ensuring the design accommodates a flat bottom. Use graph paper for clarity, marking boundaries for the front, back, and sides. This step ensures your pouch has a professional appearance and functional structure.
Understanding Seam Allowances
Seam allowances are crucial for a polished finish. A standard 1/4-inch allowance is used for most seams, ensuring precise construction. When boxing corners, increase to 1/2-inch for a clean, structured look. Consistent allowances guarantee a professional appearance, proper fit, and functionality, especially when attaching zippers or shaping the flat bottom.
Step-by-Step Sewing Guide
Master the process of crafting a flat bottom zippered pouch with clear, detailed steps. From fusing interfacing to attaching zippers and sewing sides, this guide ensures a professional finish.
Fusing Interfacing to Fabric
Fusing interfacing is essential for adding stability to your flat bottom zippered pouch. Cut the interfacing to match your fabric pieces, place the glue side down on the wrong side of the fabric, and press with a hot iron. This step ensures a crisp, structured finish. Allow the adhesive to cool before handling. Properly fused interfacing will prevent stretching and give your pouch a professional feel. Always follow the manufacturer’s instructions for best results.
Attaching the Zipper
Attaching the zipper involves placing it face down on the top edge of the outer fabric, aligning the edges, and centering it. Place the lining fabric on top, pin, and sew near the zipper teeth using a zipper foot; Repeat for the other side, ensuring alignment. Unzip halfway for turning. This step secures the zipper, ensuring functionality and a polished look for your flat bottom zippered pouch.
Sewing the Pouch Sides and Bottom
Place the outer fabrics right sides together and the lining fabrics right sides together. Sew the sides and bottom with a 1/4-inch seam allowance, leaving openings in the lining for turning. Ensure the zipper is carefully aligned to avoid damage. After sewing, box the corners by pinching the bottom seam to the side seams and stitching across for a crisp, professional finish.
Boxing the Corners
Pinch the bottom seam to the side seams, aligning edges. Sew across each corner with a 1/2-inch allowance. Trim excess fabric, ensuring a crisp, square shape. This step creates the flat bottom, allowing the pouch to stand upright and maintain its structure. After sewing, turn the pouch right side out to reveal the boxed corners, enhancing functionality and appearance.
Finishing Touches
Turn the pouch right side out through the zipper opening. Topstitch edges for a polished look and close the lining opening with a ladder stitch for a clean finish.
Turning the Pouch Right Side Out
Once sewn, carefully turn the pouch right side out through the zipper opening. Gently pull the fabric to ensure the corners are fully extended and lay flat. Use a blunt tool like a chopstick to push out the corners for a crisp finish. The flat bottom design should now sit evenly, creating a sturdy and professional-looking pouch.
Topstitching for a Professional Finish
Add a polished look to your pouch with topstitching. Sew along the edges of the fabric, using a contrasting thread color for visual appeal. Guide the fabric smoothly under the needle, maintaining consistent spacing. Backstitch at the start and end for durability. This step enhances the pouch’s professional appearance and reinforces the seams, ensuring a crisp, finished design.
Customization Ideas
Personalize your pouch with pockets, appliques, or contrasting fabrics. Add unique hardware or embroidery for a stylish touch, making it truly one-of-a-kind and functional for any occasion.
Adding Pockets or Appliques
Elevate your pouch by adding pockets or appliques for extra functionality and style. Attach small pockets for organization or decorative appliques using fabric scraps. Fuse or sew them securely, ensuring they don’t interfere with the zipper. This step is optional but adds a personal touch, making your pouch unique and visually appealing while maintaining its practicality.
Using Contrasting Fabrics for Lining
Add a stylish twist by using contrasting fabrics for the lining of your flat bottom zippered pouch. This design element not only enhances the pouch’s visual appeal but also allows for personalization. Choose a fabric that complements the outer material while adding a pop of color or pattern. The contrasting lining can also make small items easier to find, adding functionality to your creation.
Troubleshooting Common Issues
Troubleshoot common issues like zipper misalignment and uneven corners. Ensure proper zipper placement, check seam allowances, and maintain even stitching for a polished finish;
Zipper Alignment Problems
Zipper alignment can be tricky. Ensure the zipper is centered and evenly spaced. Use a zipper foot for precision and pin carefully. If misaligned, unzip and reposition. Place the zipper face down, aligning edges with the fabric. Slow, steady stitching helps maintain accuracy. Double-check placement before sewing to avoid mistakes.
Corners Not Lying Flat
If corners aren’t lying flat, check your seam allowances. Ensure edges are aligned and stitched evenly. Pinch the fabric to match the bottom seam to the side seam. Use a 1/2 seam allowance when stitching across corners. Press thoroughly after sewing. If corners pucker, adjust the stitching or trim excess fabric. Proper alignment ensures a smooth, professional finish.
Uses for Your Flat Bottom Zippered Pouch
Your flat bottom zippered pouch is perfect as a makeup bag, pencil case, or travel organizer. It can also serve as a stylish clutch or a practical storage solution for small items like jewelry or tech accessories.
Makeup Bag, Pencil Case, or Travel Organizer
A flat bottom zippered pouch is incredibly versatile. Use it as a makeup bag to store cosmetics neatly, or as a pencil case for school supplies. It’s also ideal for travel, keeping essentials like chargers, toiletries, or jewelry organized. The pouch’s upright design makes it easy to find what you need quickly, while its compact size fits perfectly in backpacks or handbags. This practical accessory is a must-have for daily use or gifting.
Gift Ideas and Personalized Projects
A flat bottom zippered pouch makes a thoughtful and practical gift for friends, family, or coworkers. Personalize it with vibrant fabrics, monograms, or appliques to add a unique touch. Perfect for birthdays, holidays, or special occasions, this handmade pouch is a versatile and heartfelt present. It’s also a great personalized project for craft fairs or DIY enthusiasts, offering endless customization possibilities to suit any style or need.
Crafting a flat bottom zippered pouch is a rewarding project that combines functionality with creativity. With these simple steps, you’ll have a versatile, personalized accessory to enjoy or share.
Final Tips for Success
For a polished flat bottom zippered pouch, use high-quality fabrics and ensure precise seam allowances. Fusible interfacing adds stability, while a zipper foot simplifies installation. Box corners neatly and topstitch for a professional finish. Don’t rush— patience ensures a flawless result. Happy sewing!
Encouragement to Experiment and Create
Embrace creativity and personalize your flat bottom zippered pouch with unique fabrics or appliques. Experiment with sizes, colors, and patterns to make it truly yours. Whether for personal use or as a gift, this project offers endless possibilities. Don’t hesitate to try new techniques—every stitch is a step toward mastering your sewing skills and creating something truly special.