Welcome to the introduction to transformer assembly and instructions․ This guide provides essential insights into safely assembling transformers, following manufacturer guidelines, and understanding key steps for optimal performance and longevity․
Safety Precautions for Transformer Assembly
Ensuring safety is critical during transformer assembly․ Never tilt the transformer, as this can cause internal damage or structural instability․ Use a crane or rollers for movement, avoiding manual lifting to prevent crush injuries․ Avoid assembly on wet surfaces or during rainy conditions to minimize electrical hazards․ Always wear personal protective equipment, including gloves and safety glasses, to protect against sharp edges or accidental electrical discharges․ Ensure the area is clear of flammable materials and properly ventilated to reduce fire risks․ Follow all manufacturer guidelines and warnings to avoid equipment damage or personal injury․ Proper grounding and insulation checks are essential before energizing․ Never attempt assembly without proper training or supervision, as this can lead to catastrophic failures or serious harm․
Importance of Following Manufacturer Instructions
Adhering to manufacturer instructions is paramount for successful transformer assembly․ These guidelines ensure proper installation, optimal performance, and safety․ Deviating from instructions can lead to equipment damage, inefficiency, or even dangerous operational failures․ Manufacturer instructions are tailored to specific transformer models, addressing unique design elements and safety protocols․ They outline critical steps for electrical connections, grounding, and insulation, which are essential for preventing hazards․ Additionally, following instructions ensures compliance with industry standards and regulations․ Properly executed assembly maintains warranty validity and guarantees reliable long-term operation․ Always refer to the provided manuals or digital resources for precise assembly procedures, as they often include troubleshooting tips and maintenance recommendations․ By following these instructions, you ensure a safe, efficient, and durable transformer system․

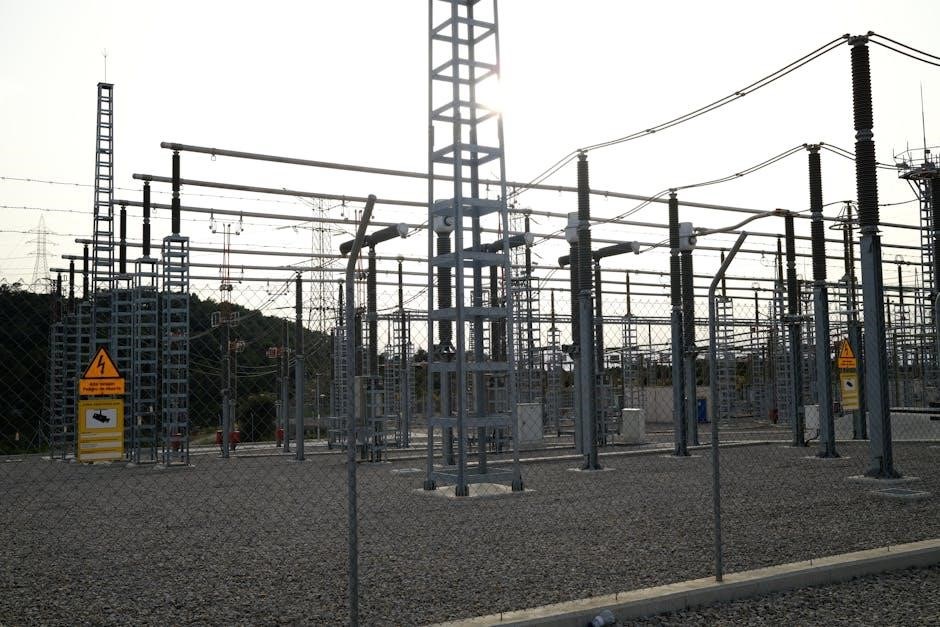
Transformer Assembly Process
The transformer assembly process involves precise steps, starting with core and coil assembly, followed by insulation and winding connections․ Proper alignment and tightening ensure reliability and safety․
Pre-Assembly Checks and preparations
Pre-Assembly Checks and Preparations
Before starting the transformer assembly, ensure the site is clean, level, and free from hazards․ Inspect all components for damage or defects․ Verify compatibility of parts and tools according to the manufacturer’s specifications․ Check electrical connections for proper insulation and integrity․ Ensure grounding systems are in place for safety․ Review the assembly manual thoroughly to understand the sequence and requirements․ Prepare necessary tools and materials, such as cranes or rollers for heavy components․ Conduct a final safety briefing with the team to address potential risks and ensure adherence to safety protocols․ Proper preparation ensures a smooth and incident-free assembly process․
Step-by-Step Transformer Assembly Instructions
Begin by unloading the transformer using a crane or rollers, ensuring it is placed on a stable, level surface․ Avoid tilting the transformer during movement to prevent damage․ Next, assemble the core and coil unit, securing it firmly to the base frame․ Connect the windings according to the manufacturer’s wiring diagram, ensuring proper insulation and tight connections․ Apply external heat if required for drying, while circulating low-voltage current through the windings to prevent moisture buildup․ Install protective relays and grounding systems to ensure electrical safety․ Use flexible connectors for bus connections to avoid overloading the terminals․ Finally, test all connections and systems before energizing the transformer․ Always refer to the manual for specific instructions tailored to your transformer model․

Installation Guidelines
Use a crane or rollers to move the transformer, placing it on a level, stable surface․ Avoid tilting during movement․ Ensure full inspection before offloading․
Electrical Connections and Mounting
- Ensure terminals are used for all electrical connections to prevent damage or safety hazards․
- Avoid using transformer terminals to support the weight of cables; use flexible connectors for bus connections․
- Mount the transformer on a stable, level surface to ensure proper operation and minimize vibration․
- Verify grounding systems are correctly installed to maintain safety and equipment protection․
- Double-check all connections for tightness and accuracy before energizing the transformer․
Always refer to the manufacturer’s instructions for specific mounting and connection requirements․
Testing and Commissioning Post-Installation
After installation, perform thorough testing to ensure the transformer operates safely and efficiently․ Conduct insulation resistance tests using a megohmmeter to verify electrical integrity․ Check voltage and current levels to confirm they match specifications․ Test cooling systems to ensure proper heat dissipation․ Verify grounding systems are functional and protection relays are calibrated․ Perform a visual inspection for any signs of damage or loose connections․ Record all test results for future reference․ Ensure all tests are conducted by qualified personnel following manufacturer guidelines․ This step is critical to prevent potential failures and ensure compliance with safety standards․

Energizing the Transformer
Ensure all safety measures and manufacturer guidelines are followed․ Conduct thorough pre-energization checks, including insulation tests and connections verification․ Carefully energize the transformer, monitoring for any anomalies․
Pre-Energization Checks and Safety Measures
Before energizing a transformer, conduct a series of critical checks to ensure safety and proper functionality․ Verify that all electrical connections are secure and correctly configured, with no loose or damaged wires․ Inspect the transformer’s insulation and winding for any signs of damage or wear․ Ensure the grounding system is properly installed and functioning to prevent electrical hazards․ Perform insulation resistance tests and verify the transformer’s polarity․ Check the cooling system to ensure it is operational and free from obstructions․ Review and follow the manufacturer’s specific pre-energization instructions․ Wear appropriate personal protective equipment, including gloves and safety glasses․ Ensure the area is clear of unauthorized personnel and that all safety locks and tags are in place․ Finally, confirm that the transformer is de-energized before starting any tests or connections․
Initial Energization Steps and Monitoring
Once all pre-energization checks are completed, proceed with the initial energization of the transformer․ Ensure the transformer is set to the correct voltage and tap settings as specified in the manufacturer’s instructions․ Begin by energizing the primary winding while keeping the secondary winding disconnected or under no-load conditions․ Monitor the transformer’s voltage, current, and temperature closely during this process․ Use specialized test equipment to measure insulation resistance and verify that no abnormal conditions arise․ Listen for unusual sounds or vibrations, which could indicate internal issues․ Record all initial readings for future reference and ensure continuous monitoring for at least 24 hours after energization․ This step is crucial to identify and address any potential issues early, ensuring reliable and safe operation of the transformer․
Maintenance and Troubleshooting
Regular inspections, oil analysis, and cooling system checks ensure optimal transformer performance․ Addressing unusual sounds, leaks, or overheating promptly prevents major failures․ Diagnostic tests like insulation resistance and winding resistance help identify issues early, ensuring reliability and safety․
Routine Maintenance for Optimal Performance
Regular maintenance is crucial for ensuring transformers operate efficiently and safely․ This includes inspecting for signs of wear, checking oil levels, and analyzing cooling systems․ Cleaning dust from vents and ensuring proper ventilation prevents overheating․ Verifying all electrical connections and tightening loose terminals is essential․ Manufacturers often recommend periodic oil tests to detect moisture or contamination․ Additionally, routine inspections of insulation resistance and winding resistance help identify potential issues early․ Following a structured maintenance schedule, as outlined in the manufacturer’s instructions, ensures longevity and reliability․ Proper record-keeping of maintenance activities is also vital for tracking performance and planning future servicing․ By adhering to these practices, transformers can deliver consistent performance while minimizing the risk of unexpected failures․
Common Issues and Diagnostic Procedures
Transformers can experience issues such as overheating, insulation failure, or oil contamination, which may lead to reduced efficiency or complete shutdown․ Diagnosing these problems involves checking for unusual noises, vibrations, or discoloration․ Thermal imaging can detect hotspots, while oil analysis reveals contamination or moisture․ Insulation resistance testing identifies degradation, and winding resistance tests uncover internal faults․ Short circuits or open circuits in windings are diagnosed using specialized test equipment․ Regular inspections and adherence to maintenance schedules help prevent these issues․ If problems arise, following manufacturer guidelines for repairs and replacements is essential․ Early detection through these diagnostic procedures ensures minimal downtime and prolongs the transformer’s lifespan, maintaining reliable operation and safety standards․