Singer 4423 Heavy Duty Sewing Machine: A Comprehensive User Guide
Welcome! This guide provides detailed instructions for operating and maintaining your Singer 4423, ensuring years of reliable sewing performance and enjoyment.
The Singer 4423 Heavy Duty Sewing Machine is a popular choice for both beginners and experienced sewists alike; Known for its durability and power, this machine effortlessly handles a wide range of fabrics, from lightweight cotton to heavy-duty denim and canvas.
It’s designed to tackle various projects, including garment construction, quilting, home décor, and repairs. This user guide aims to provide a comprehensive understanding of your machine, covering everything from initial setup to advanced techniques.
We will walk you through each step, ensuring you can confidently utilize all the features the 4423 offers. Expect clear, concise instructions, accompanied by helpful tips to maximize your sewing experience. Prepare to unlock the full potential of this versatile and reliable sewing companion!
Unboxing and Initial Setup
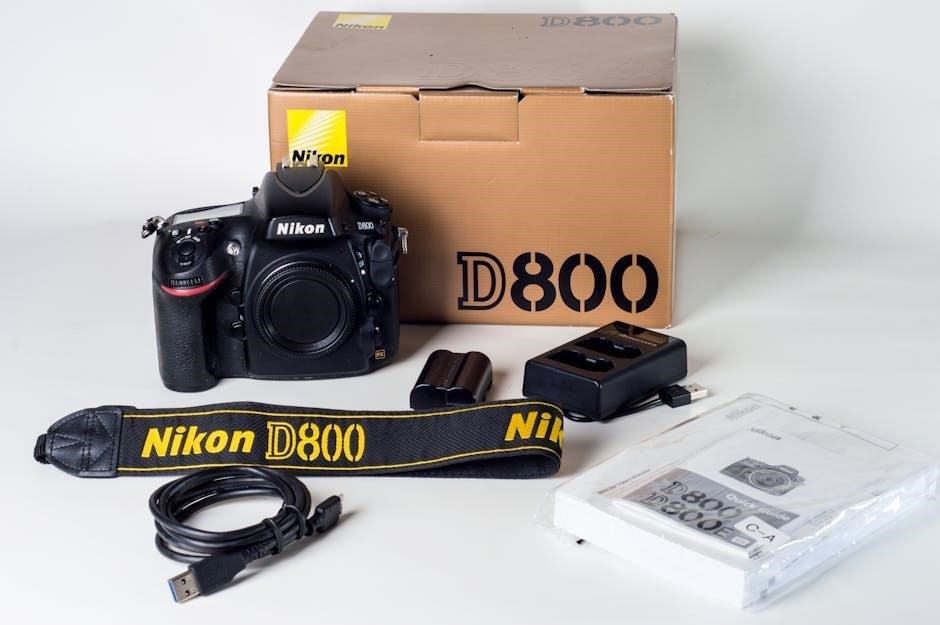
Carefully unpack your Singer 4423 and verify all components are present. The box should contain the sewing machine, power cord, foot controller, accessory kit (including various presser feet, bobbins, needles, and screwdriver), and this user manual.
Remove all packing materials and protective coverings. Place the machine on a stable, flat surface with adequate space for operation. Connect the power cord to the machine and a grounded electrical outlet. Attach the foot controller.

Before starting, ensure the power switch is in the “OFF” position. A quick visual inspection for any shipping damage is recommended. Proper initial setup is crucial for optimal performance and longevity of your new sewing machine.
Parts List Verification
To ensure a complete setup, meticulously compare the contents of your box with the parts list provided below. You should find: 1 x Singer 4423 Sewing Machine, 1 x Power Cord, 1 x Foot Controller, 1 x Accessory Kit (containing multiple presser feet – zipper, buttonhole, all-purpose, etc.), 4 x Bobbins (Class 15), 5 x Needles (various sizes), 1 x Screwdriver, 1 x Seam Ripper, 1 x Spool Pin, 1 x Auxiliary Spool Pin, and 1 x Dust Cover.
Carefully check each item against the illustrations in this manual. If any parts are missing or damaged, immediately contact Singer customer support for replacement. Do not attempt to operate the machine without all necessary components. Maintaining a complete parts inventory ensures seamless operation and prevents delays in your sewing projects.
Powering On and Basic Functionality Check
Before commencing any sewing, verify the machine’s basic functionality. First, connect the power cord to the machine and a grounded electrical outlet. Ensure the power switch, located on the machine’s side, is in the “Off” position. Then, plug in the foot controller. Gently press the foot controller – the needle should begin to move.
If the needle doesn’t move, recheck all connections and the power switch. Select a straight stitch using the stitch selection dial. Test the stitch by slowly pressing the foot controller while holding a scrap fabric under the presser foot. Observe the stitch formation. If issues arise, consult the troubleshooting section. A successful initial check confirms proper operation before starting your project.
Understanding the Machine Components
The Singer 4423 boasts several key components crucial for operation. The needle, driven by the machine, forms the stitches. The presser foot holds fabric in place during sewing. Beneath the needle plate resides the bobbin, supplying the lower thread. The needle plate supports the fabric and features markings for accurate sewing.
The handwheel allows manual needle positioning, while the reverse lever enables backstitching. Familiarize yourself with the stitch selection dial for choosing desired stitch patterns. The speed control regulates sewing speed. Understanding these parts and their functions is fundamental to mastering your Singer 4423 and achieving optimal sewing results.
Key Parts Identification (Needle, Presser Foot, Bobbin, etc.)
Let’s pinpoint essential parts. The needle (1), a vital component, comes in various sizes for different fabrics. The presser foot (2), interchangeable for diverse tasks, secures material. The bobbin (3), wound with lower thread, sits within the bobbin case. The bobbin case (4) holds the bobbin and regulates thread flow.
The needle plate (5) supports fabric; markings aid in seam allowances. The feed dogs (6) advance fabric under the needle. The spool pin (7) holds the thread spool. The tension dial (8) adjusts thread tension. Knowing these parts – their names and locations – is the first step towards confident Singer 4423 operation. Refer to diagrams in your full manual for visual aid.

Control Panel Overview (Stitch Selection, Speed Control)
The Singer 4423’s control panel is intuitively designed for ease of use. The stitch selection dial (1) allows you to choose from 23 built-in stitches – straight, zigzag, decorative, and more. Simply rotate the dial to your desired stitch. The stitch length dial (2) adjusts the length of each stitch, impacting fabric strength and appearance.
The stitch width dial (3) controls the width of zigzag and decorative stitches. Crucially, the speed control slider (4) lets you regulate sewing speed, ideal for beginners or intricate work. A reverse lever enables backstitching for secure seams. Familiarize yourself with these controls to unlock the full potential of your machine and achieve professional results.
Threading the Singer 4423
Proper threading is essential for smooth sewing. Begin by ensuring the machine is off and the presser foot is up. The threading path is clearly marked on the machine with numbered arrows. First, guide the thread through the spool pin, then down through the tension disc. Next, thread it through the take-up lever, ensuring it’s fully inserted.
Continue threading through the guide on the needle clamp, and finally, thread the needle from front to back. For optimal results, use a needle threader if needed. Incorrect threading is a common cause of issues, so double-check each step against the diagram. Remember to always use quality thread compatible with your fabric type.
Upper Threading Guide – Step-by-Step
Step 1: Place the thread spool on the spool pin. Step 2: Draw the thread down and to the right, under the spool pin guide. Step 3: Continue down and between the tension discs – ensure the thread snaps firmly into place. Step 4: Lift the presser foot and thread the take-up lever from left to right.
Step 5: Guide the thread down and around the guide on the needle clamp. Step 6: Finally, thread the needle eye from front to back. A needle threader can be incredibly helpful here! Always verify the thread is securely seated in each guide. If you encounter resistance, retrace your steps and ensure correct placement. A properly threaded machine is key to successful sewing.
Bobbin Winding and Insertion
Winding the Bobbin: Place the thread spool on the spool pin. Guide the thread through the bobbin winding tension disc and onto the bobbin. Place the bobbin onto the bobbin winder spindle and push it to the right to engage. Press the foot pedal gently to begin winding; the machine will stop automatically when full.
Inserting the Bobbin: Locate the bobbin case. Drop the wound bobbin into the case, ensuring it rotates freely. Draw up the thread through the slot in the bobbin case. Lift the needle plate cover and insert the bobbin case into the machine. Finally, draw up the bobbin thread through the designated hole in the needle plate.
Basic Sewing Techniques
Getting Started: Before beginning, ensure your machine is correctly threaded and the bobbin is properly inserted. Practice on scrap fabric first to get comfortable with the machine’s speed and control. Always use the appropriate needle type and size for your fabric.
Fabric Handling: Gently guide the fabric under the presser foot, avoiding pushing or pulling. Maintain a consistent seam allowance using the markings on the needle plate. Keep your hands a safe distance from the needle. For best results, use a smooth, even motion and let the machine feed the fabric.
Straight Stitching – Mastering the Fundamentals
The Foundation of Sewing: The straight stitch is the most commonly used stitch and forms the basis for many sewing projects. Select the straight stitch option on your Singer 4423’s control panel. Begin by lowering the presser foot and gently guiding the fabric under it.
Stitch Length Adjustment: Experiment with different stitch lengths (typically between 2.5 and 3.0) depending on your fabric weight. Shorter stitches are ideal for delicate fabrics, while longer stitches work well for heavier materials. Maintain a consistent speed for a uniform stitch line. Backstitch at the beginning and end of your seam to secure the stitches.
Zigzag Stitching – Applications and Adjustments
Versatility in Stitching: The zigzag stitch offers incredible versatility, perfect for finishing raw edges, creating decorative elements, and sewing stretch fabrics. Select the zigzag stitch on your Singer 4423. Adjust the stitch width and length using the corresponding dials; wider stitches create a bolder zigzag, while longer stitches offer more stretch.
Applications & Fine-tuning: Use a narrow zigzag for reinforcing buttonholes or preventing fabric fraying. A wider zigzag is excellent for attaching elastic or creating decorative edging. Practice on scrap fabric to determine the optimal settings for your specific project and fabric type. Remember to test stitch tension for best results!
Stitch Selection and Customization
Exploring Stitch Options: Your Singer 4423 boasts a variety of built-in stitches, extending beyond basic straight and zigzag. Utilize the stitch selection dial to cycle through options like decorative stitches, buttonhole stitches, and stretch stitches. Refer to the stitch guide chart (often located on the machine itself) for visual representations and suggested applications for each stitch.

Personalizing Your Stitches: Beyond selection, customization is key. Adjust stitch length and width using the dedicated dials. Shorter stitch lengths provide greater durability, ideal for heavy-duty fabrics, while longer lengths are suitable for basting or gathering. Experiment with stitch width to achieve desired aesthetic effects and functional results.
Exploring the Built-in Stitch Options
Diverse Stitch Library: The Singer 4423 offers 23 built-in stitches, catering to a wide range of sewing projects. Beyond the standard straight and zigzag, discover options like a blind hem stitch for invisible hems, several decorative stitches for embellishment, and a stretch stitch designed for knit fabrics. A dedicated buttonhole stitch simplifies creating professional-looking buttonholes.
Stitch Chart Reference: Consult the stitch chart printed on the machine or within the included manual. This chart visually displays each stitch pattern and provides recommended settings for various fabric types. Experiment with different stitches on scrap fabric to understand their unique characteristics and best applications before starting your project. Don’t hesitate to test and learn!
Adjusting Stitch Length and Width
Precise Control: The Singer 4423 allows for independent adjustment of stitch length and width, crucial for achieving desired results on different materials. Stitch length is controlled by the dial located on the machine’s head, ranging from 0 to 4mm. Shorter stitch lengths are ideal for delicate fabrics and increased durability, while longer lengths suit basting or thicker materials.
Width Customization: Stitch width is adjusted using a separate dial, typically offering a range up to 6mm for zigzag and decorative stitches. Wider stitches provide greater fabric coverage and are suitable for finishing raw edges or creating decorative effects. Always test your chosen settings on a scrap piece of fabric before sewing your final project to ensure optimal appearance and functionality.
Presser Feet – A Detailed Look
Versatility Enhanced: The Singer 4423’s functionality is significantly expanded by its range of interchangeable presser feet. Each foot is designed for specific sewing tasks, offering improved control and precision. Understanding each foot’s purpose unlocks the machine’s full potential.
Specialized Applications: Beyond the standard foot, options include a zipper foot for close-to-edge stitching, a buttonhole foot for perfectly formed buttonholes, and an overcast foot for finishing fabric edges. Additional feet, sold separately, cater to techniques like quilting, darning, and gathering. Correct foot selection dramatically impacts stitch quality and project outcome. Refer to the included accessory guide for detailed foot identification and usage instructions.
Standard Presser Foot – General Use
The Workhorse Foot: The standard presser foot, typically already attached to your Singer 4423, is your go-to for most everyday sewing applications. It’s designed for straight stitching, zigzag stitching, and a wide variety of fabrics – from lightweight cottons to medium-weight denim. Its smooth sole ensures consistent fabric feed and even stitch formation.
Proper Attachment & Adjustment: Ensure the foot is securely snapped into place; a loose foot can cause skipped stitches or uneven fabric handling. The presser foot pressure is pre-set for optimal performance with standard fabrics, but can be adjusted (though rarely necessary) for particularly thick or delicate materials. Always lower the presser foot before beginning to sew; this engages the feed dogs and ensures proper fabric movement.
Zipper Foot – Installing and Using
Sewing Zippers with Ease: The zipper foot is essential for installing zippers neatly and professionally. Unlike the standard foot, the zipper foot can be positioned to sew very close to the zipper teeth, on either the left or right side. This allows for precise stitching without interference from the foot itself.

Installation & Positioning: To install, remove the standard foot and snap the zipper foot into place. Experiment with positioning the foot – move it to the left or right – to determine which side provides the closest stitch to the zipper coils. Slowly guide the fabric under the foot, keeping the zipper teeth aligned with your desired stitch line. Use a longer stitch length for zippers to prevent puckering and ensure a durable seam.
Troubleshooting Common Issues
Addressing Sewing Challenges: Even with proper setup, occasional issues can arise. This section addresses common problems and provides solutions to get you back to sewing quickly. Frequent issues include thread breakage, needle breakage, skipped stitches, and fabric bunching. Often, these are caused by incorrect threading, a dull needle, improper tension, or using the wrong needle type for the fabric.
Diagnostic Steps: Before seeking professional help, re-thread the machine, ensuring the presser foot is up during threading. Replace the needle with a new one of the correct size and type. Check the bobbin winding and insertion. Adjust the tension dials incrementally. Refer to the specific issue sections for detailed troubleshooting steps and preventative measures;
Thread Breakage – Causes and Solutions
Identifying the Problem: Thread breakage is a common frustration, but usually easily resolved. Several factors can contribute, including incorrect threading, a poorly wound bobbin, using low-quality thread, a dull or damaged needle, or incorrect tension settings. Fabric type also plays a role; heavier fabrics require stronger thread and potentially a larger needle.
Troubleshooting Steps: First, re-thread the entire machine, ensuring the thread is properly seated in all guides and discs. Rewind the bobbin, ensuring even tension. Replace the needle. Check the tension – too tight or too loose can cause breaks. Finally, try a different brand of thread. If the problem persists, consult the machine’s diagram for correct threading paths.
Needle Breakage – Prevention and Repair
Preventing Breaks: Needle breakage can be startling, but is often preventable. Always use the correct needle type and size for your fabric. A too-thin needle attempting to sew thick material is a primary cause. Avoid sewing over pins – this is a major culprit! Ensure the needle is fully inserted and tightened correctly. Never force the fabric through the machine; let the feed dogs do the work.

Repair and Replacement: If a needle breaks, immediately stop the machine and carefully remove the broken piece. Always replace a broken needle – never attempt to reuse it. When installing a new needle, ensure the flat side is facing the back of the machine. Regularly inspect your needles for any signs of bending or damage, even if they haven’t broken.
Maintenance and Cleaning
Importance of Regular Care: Consistent maintenance extends the life of your Singer 4423 and ensures optimal performance. Dust, lint, and old oil can build up, causing malfunctions and reducing stitch quality. A clean machine operates smoothly and quietly.

Cleaning Procedures: Unplug the machine before cleaning! Use a soft brush to remove lint from the bobbin area, feed dogs, and around the needle plate. A small vacuum cleaner attachment can also be helpful. Wipe down the exterior with a damp cloth. Avoid using harsh chemicals or abrasive cleaners.
Scheduled Checks: Aim to clean your machine after every 8 hours of use, or more frequently with heavy use. Regular attention prevents significant buildup and keeps your Singer 4423 running like new.
Regular Cleaning Schedule
Daily/After Each Use: Remove lint and thread scraps from the bobbin area and around the needle plate. This prevents buildup and ensures smooth operation. A quick brush is usually sufficient.
Weekly (or after 8 hours of use): Thoroughly clean the feed dogs with a brush, removing any accumulated lint. Wipe down the exterior surfaces with a slightly damp cloth. Check the bobbin case for debris.
Monthly: Deep clean the entire machine, including hard-to-reach areas. Consider using a sewing machine cleaning spray (follow manufacturer’s instructions). Inspect and clean the needle plate thoroughly. This proactive approach maintains peak performance and extends the machine’s lifespan.
Lubrication – When and How
The Singer 4423 is designed to be largely self-lubricating, minimizing the need for frequent oiling. However, periodic lubrication is crucial for long-term performance. Oil only when necessary – typically after every 6-12 months of regular use, or if you notice increased noise or sluggish operation;
Use only sewing machine oil! Apply 1-2 drops to the bobbin race and the needle bar area (access points are usually indicated in your machine’s diagram). Avoid over-oiling, as excess oil attracts lint and can cause problems. After oiling, run the machine briefly to distribute the lubricant. Wipe away any excess oil immediately.